sábado, 29 de septiembre de 2012

Higos con galletas sablé y mascarpone / Figs with sablé cookies and mascarpone


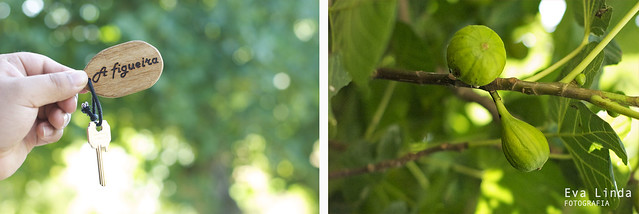
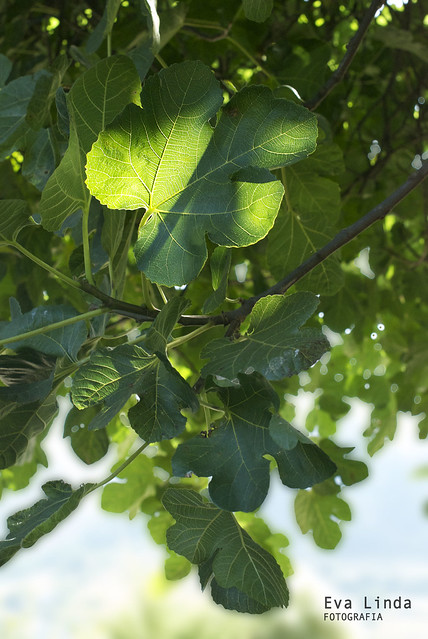
Este mes vengo "vestida de dulce" por que la ocasión se lo merecía. Teniendo esos higos de delicado sabor era tentador preparar un postre. Pero en mi casa no somos de comer mucho dulce, así que debía ser algo que no fuera empalagoso.

En esta receta los higos aportan la parte dulzona; el queso fresco mascarpone le da frescura y unas notas ácidas; y la galleta, el toque crujiente y untuoso. 

En este caso, yo he preparado la receta "de cabo a rabo", es decir, las galletas, los higos caramelizados y la crema de mascarpone. Pero si queréis hacer una versión más rápida y simple, podéis utilizar alguna galleta que os guste. Creo que podrías combinar bien con alguna que tenga almendras o un toque de canela.

Este es un plato en el que podemos tener preparadas las galletas y la crema de mascarpone, pero es recomendable preparar a último minuto los higos, y servir tíbio.

¿Qué vamos a necesitar si queremos preparar unas 8 porciones?

Para las galletas sablé:
150g de mantequilla
90g de azúcar lustre
1 huevo pequeño batido
250g de harina

Preparación de las galletas:
1. Mezclamos la mantequilla con el azúcar y batimos bien hasta que haya blanqueado un poco. 
2. Añadimos el huevo y mezclamos de nuevo.
3. Tamizamos la harina y la incorporamos mezclando a la mezcla anterior, hasta obtener una masa uniforme.
4. La ponemos entre papel transparente y la aplanamos con un rodillo. O rellenamos la manga pastelera con la masa (debe quedar blandita).
5. Dejamos reposar la masa en la nevera durante unos 20 minutos.
6. Si hemos preparado una placa entre film transparente cortamos las galletas con un cortamoldes o con un cuchillo de hoja fina (no de sierra). Pero si vamos a usar la manga pastelera, damos la forma deseada a la galleta encima de la placa de hornear.
En este caso yo usé una boquilla cornet plana 20x3 e hice dos hileras juntas.
7. Horneamos a 170ºC durante unos 20 minutos o hasta que estén doradas.

Para la crema de mascarpone:
250g de mascarpone
100ml de nata para montar
40g de azúcar
una pizca de canela molida (opcional)

Preparación de la crema de mascarpone:
1. Bate la nata de montar con el azúcar y la canela sólo un poco sin que llegue a montar del todo.
2. Añade el queso mascarpone y sigue batiendo hasta obtener una pasta homogénea. 
3. Conservala refrigerada mientras no vamos a servir.

Para los higos caramelizados:
100g de azúcar
1 trozito de canela en rama (opcional)
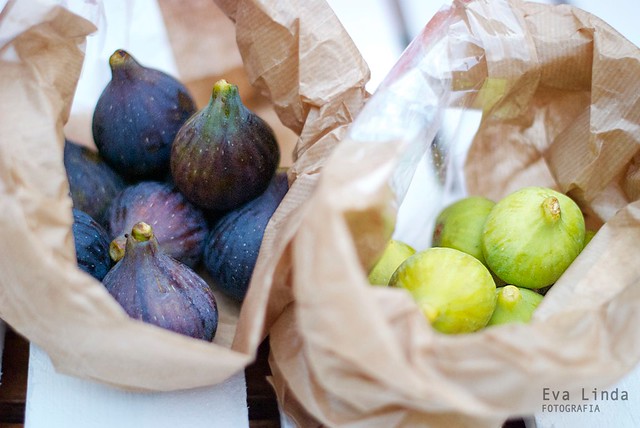
8 higos frescos
zumo de 1 limón
agua

Preparación de los higos caramelizados:
1. Lava y corta los higos por la mitad. Procura dejar un poco de rabo para que sean más bonitos. ¡Cuida la estética del plato!
2. En un cazo pon a cocer el azúcar con la canela y un chorrito de agua. Cuándo empieza a caramelizar añade los higos y el zumo del limón. 
3. Cocina a fuego lento y ve girando los higos para que se caramelicen bien.

Servir:
1. Con la ayuda de dos cucharas forma "querelles" (bolitas alargadas). Es decir pasa la masa de una cuchara a la otra formando una bolita alargada de crema de queso. 
2. Sirve dos "quenelles" encima de cada galleta. Y cubre de nuevo con otra galleta.
3. Encima coloca dos mitades de higos y decora con un poco del caramelo de higos que habrá quedado en el cazo.
4. ¿Y a qué estás esperando? Disfrútalo.


_________________________________________________________________


This month I come "dressed in sugar" because the occasion deserves it. The delicate flavor of figs lends itself to creating amazing desserts, but at home we don't really have a sweet tooth so I had to cook something that wouldn't be too sickly.

In this recipe, figs bring in the sweet bit; the fresh mascarpone cheese contributes with freshness and a little bit of an acidic flavor; and the biscuits gives it the crunchy and oily element.

I have prepared this recipe from beginning to end; which is to say, I have done the biscuits, the caramelized figs and the mascarpone cream. However, if you'd like a quicker version, you could use other biscuits you like, especially if they have almonds and a little touch of cinnamon.

For this dessert, you can prepare the biscuits and cream cheese ahead of time, but you should prepare the figs just before serving so they're still warm.

What ingredients will we need to prepare 8 portions?

Biscuits
150g butter 
90g icing sugar
1 small egg, whisked
250g flour

Preparation
1. Mix the butter with the sugar and beat until white.
2. Add the egg and mix again.
3. Sieve the flour and gently add it to the mix, until well combined.
4. Place the mix between two sheets of baking paper and flatten it with a roller. Or fill a pastry bag with the dough (it should be squishy).
5. Leave the dough to rest in the fridge for 20 minutes.
6. If you placed the dough in baking paper, slice the biscuits with a cookie cutter (or something to that effect). If you used the pastry bag, shape your biscuits with pleasure :). Place biscuit dough on a baking tray.
7. Bake at 170ºC for 20 minutes or until golden.

Mascarpone cream
250g mascarpone
100ml whipping cream
40g sugar
ground cinnamon (optional)

Preparation
1. Beat the cream with the sugar and cinnamon, just a little bit.
2. Add the mascarpone cheese and keep beating until you get an homogeneous thick cream.
3. Keep it in the fridge until serving.

Caramelized figs
100g sugar
1 cinnamon stick (optional)
8 fresh figs
juice of 1 lemon
water

Preparation
1. Wash and cut the figs in half. Try to leave a little bit of the tale so they look nicer. Keep an eye on the aesthetics of your dessert!
2. In a saucepan, cook the sugar with the water (and cinnamon) until it begins to caramelize; add the figs and lemon juice.
3. Cook in low heat and turn the figs so they caramelize properly.

Serving
1. Using two spoons, make a large ball of cream cheese.
2. Place two cream cheese balls on top of a biscuit, and place another biscuit on top.
3. On top of this, place two halves of a fig and embellish with the caramel from the figs.
4. And now… Enjoy!


martes, 25 de septiembre de 2012

A Figueira

A Figueira

- ¿Quién tiene la llave de "la higuera"? 

- ¡Quién la tenga que la traiga que queremos llenar nuestro cesto de higos!

- ¿Y qué vamos a hacer con tantos higos?

- ¡Mil y una recetas!

Septiembre va llegando a su fin y estamos muy contentas porque estamos recibiendo fabulosas recetas con higos. No te olvides y mándanos la tuya para publicarla junto a la nuestra, antes del 30 de septiembre.


Higuera

Pero mientras, nos quedamos descansando un ratito bajo la sombra de la higuera antes de ir a la cocina a preparar nuestras recetas.

Nota: Esta Llave pertenece a la habitación "A Figueira", una de las habitaciones de la fabulosa casa rural "Casa da Penela" en Galicia. ¡Muy recomendable!

___________________________________________________________________________________________

- Who has the key to the fig tree?
- He who has it, bring it along because we want to get a big basket of figs!
- And what are you doing with so many figs?
- We're cooking a thousand and one recipes!

The end of September is upon us and we're very happy to have been receiving so many delicious fig recipes from our readers! Don't forget to send yours in so we can publish it before the 30th September.

Before heading to the kitchen to prepare our recipes, we'll just have a little rest under the fig tree.

Note: The key belongs to the house "The fig tree", one of the houses of the fabulous farm Casa da Penela in Galicia, Spain. Recommended!

domingo, 9 de septiembre de 2012

Higos / Figs

Y ya estamos en septiembre y con él la propuesta de ingrediente del segundo mes. Y en esta ocasión nos vamos al campo para disfrutar de esos grandes árboles repletos de... HIGOS.


Higos / Figs

Los higos son los frutos de las higueras, unos árboles longevos (pueden llegar a vivir más de 100 años) muy resistentes a los climas extremos. Por lo general, ofrecen dos cosechas al año, una de brevas en primavera y otra de higos a finales de verano. Las zonas de mayor producción mundial son California (USA) y Turquía.

Los higos pueden ser de color verde, morado o café. Con una pulpa interior repleta de semillas, de un dulce sabor, debido a su alto contenido en azúcares.

Y cómo se dice popularmente, para saber que la fruta está en su mejor punto de maduración debemos cerciorarnos que tiene "el cuello del ahorcado" (rabo seco), "ropa de pobre" (piel arrugada) y "ojo de viuda" (al abrirlo desprende una lágrima de almíbar).

Al ser una fruta muy estacional podemos conservarla en almíbar, o seca. Además de preparar jaleas, mermeladas, etc. 

¿Te apuntas a descubrir con nosotras esta fruta des de tu cocina? Envíanos la foto de una receta con higos antes del 30 de septiembre. O publícala en tu blog y mándanos el enlace.

_________________________________________________________________

September is here and with it, the ingredient for the second month of Cocina Global. This time we go to the fields to enjoy those great trees loaded with... FIGS.

Figs are the fruit of the fig tree, long-lived trees which can live more than 100 years and are very resistant to extreme weather. There are usually two crops a year, one in spring called breva's crop and another at the end of summer, which is the main crop. The areas of greatest global production are California (USA) and Turkey.

Figs can be green, purple or brown, with a full inner seed pulp, sweet in taste due to its high sugar content.

There's a saying that says that to know the fruit is at its best point of maturity one must ensure that it has "the neck of a hanged man" (dry tail), "poor clothes" (wrinkled skin) and "a widow's eye" (when you open it, the fruit secretes a syrup's tear).

It's a seasonal fruit, so it could be preserve in syrup or dried. Alternatively, you can do jellies, jams, etc..

Do you fancy signing up to discover this fruit with us? Send us a photo of a recipe with figs before the 30th of September or write a post on your blog and send us the link.

Let the fig journey begin :)


Fuentes / Sources:
El higo, fruto completo: http://www.alimentacion-sana.com.ar/informaciones/novedades/higos.htm
FAO: http://www.fao.org/inpho_archive/content/documents/vlibrary/AE620s/Pfrescos/HIGO.HTM
California rare fruit growers: http://www.crfg.org/pubs/ff/fig.html 


viernes, 7 de septiembre de 2012

Sardinas a la parrilla al estilo portugués / Grilled sardines Portuguese style


Las sardinas son una de las cosas más importantes en Portugal. Des mayo a septiembre, el país manda al cielo comida en forma de sardinas asadas. Deliciosas y baratas, no puedes quedar mal con este pequeño pez y a la vez tan sano.

En Portugal, tendimos a comer sardinas en los restaurantes (revisa el final del post) ya que la mayoría de las personas no disponen de jardín en sus casas, pero a veces se presenta la oportunidad de disfrutar de una sardinhada (barbacoa de sardinas). Esta normalmente se sirve con patatas hervidas, pimientos asados, ensalada y broa o pan. En el Norte, de dónde soy, broa de Avintes [1,2] es el verdadero placer.

Me tomó un tiempo encontrar sardinas frescas en Oxford, pero finalmente un pescadero de Tesco vino a mi rescate y me trajo 11 sardinas de Cornualles, todo lo que tenía! "¿Por qué quieres tantos y por qué fotografías la etiqueta?"...  hum... "porque soy extranjera!".

Las sardinas asadas son un plato delicioso y fácil de preparar. El único problema es su olor... prepárate para lavar toda la ropa y darte una buena ducha después de cocinarlas. Aquí va:

1. Lava las sardinas y ponlas en la bandeja.
2. Sala el pescado con sal gruesa y déjalo reposar en frío (si lo refrigeras es suficiente).
3. Pon las patatas a hervir (yo usé patatas nuevas) en agua con sal, a fuego medio-bajo.
4. Enciende la parrilla y espera a que esté lista.
(Por el momento no disponemos de una barbacoa decente, así que usé dos barbacoas desechables. Aunque son simples y brillantes, no soy fan de estas barbacoas porque genera una cantidad considerable de residuos y son pequeñas!)
5. Prepara la ensalada. Yo preparé tomates y pepinos, con poquita sal y un chorrito de aceite. Añade el orégano seco si tienes en casa!
6. Asa las sardinas y los pimientos. No te olvide de flamear las sardinas. Por lo general, los pescados están listos cuándo tienen los ojos completamente blancos.

7. Sirve!

Las sardinas a la parrilla se sirven con patatas nuevas hervidas, pimientos, ensalada y pan hecho en casa*, aderezados con aceite de oliva**. Acompañamos la comida con vinho verde portugués, cómo debe ser. Alimentos de los dioses. En forma de sardina. Un punto!

El chef quisiera dar las gracias a sus asistentes (Nicky y Jamie) por encender la barbacoa, por el apoyo moral en general, por fotografiarla en acción y por la toma de muestra en el menú.


*Hice el pan por la mañana con esta receta. Me chifla Concha (ama de casa) :)


**El aceite de oliva no aparece en la foto porque la chef estaba demasiado excitada para recordar agregar el aceite en un plato cuidadosamente preparado. La cocinera y sus dos invitados se auto-rellenaron con las sardines  que previamente habían elaborado y preparó el plato olvidándose de algo.  Definitivamente, añadid el aceite a vuestro plato, si estás cocinando en casa :)

Y aquí os comparto un viaje a un restaurante portugués a finales de agosto...


_________________________________________________________________

Sardines are a big thing in Portugal. From May to September, the country is treated to food heaven in the form of grilled sardines. Yummy and cheap, you really cannot go wrong with this small healthy fish.

In Portugal, we tend to eat sardines in restaurants (check the end of the post) as most people won’t have a garden, but sometimes the opportunity arises to have a sardinhada (BBQ of sardines) which you prepare yourself. They’re typically served with boiled potatoes, grilled peppers, salad and broa or bread. In the North, where I’m from, broa de Avintes [1, 2] is the real treat.

Finding fresh sardines in Oxford took a while, but eventually Tesco’s fishmongers came to the rescue and I bought 11 Cornish sardines, all they had! “Why do you want so many and why are you photographing the label?”… hum… “because I’m foreign!”.

Grilled sardines are a delicious and easy dish to cook. The only problem is the smell… be prepared to wash all your clothes and shower thoroughly afterwards. Here goes:

1. Wash the sardines and put in tray.
2. Salt the fish with coarse salt and leave to rest in the cold (the fridge will do).
3. Put your potatoes to boil (I used new potatoes) in salted water, low-medium heat.
4. Light the grill and wait until it’s ready.
(We don’t have a decent barbecue at the moment, so I used two disposable ones. Whilst they did the trick and were brilliant, I’m not a fan because it’s a lot of waste and they are too small!)
5. Prepare your salad bits. I prepared tomatoes and cucumber, very lightly salted and with a drizzle of olive oil. Add oregano, especially if you have home dried oregano!
6. Grill your sardines and peppers. Don’t forget to turn the sardines. As a rule, the fish is ready when the eyes are fully white.
7. Serve!

The grilled sardines were served with boiled new potatoes, peppers, salad and homemade bread*, drizzled with olive oil**. We accompanied the meal with Portuguese vinho verde, just as it should be.
Food heaven. In the form of sardines. Score!

The chef would like to thank her glamorous assistants (Nicky and Jamie) for lighting the barbecue, providing overall moral support, photographing her in action, and sampling the menu.

*I made the bread in the morning following this recipe. I have a chef crush on homemaker Concha :)

**The olive oil is missing from the picture because the chef was too excited to remember to add the olive oil on such a carefully prepared plate. The chef and her two guests had been stuffing themselves with previously grilled sardines and by the time she prepared the plate something got forgotten. Definitely add olive oil to your plate, if you cook this at home :)

A trip to a Portuguese restaurant in Porto at the end of August...

Sardinas en escabeche / Marinated sardines


Y aquí viene derrapando... la última receta que hemos recibido este mes, de manos de Livia Artiles.

Livia, igual que Cristina no es una entusiasta de la cocina, pero en esta ocasión, se puso su delantal para acompañarnos. Y eso, nos llena de alegría.

Cómo no podía ser de otra forma, Livia nos acerca a la comida venezolana a través de esta receta de Sumito Estévez, un reconocido cocinero de su país.

Ingredientes:


Nota: faltan 2 hojitas de laurel

Preparación:

1. Sazonar con sal y pimienta las sardinas. Y pasarlas por harina.
2. Dorar las sardinas en una sartén muy caliente. Escurrir y reservar.
3. Saltear las cebollas en aceite de oliva, agregar el ajo y el curry. Desglasar la sartén con vino blanco.
Nota de Livia: sin enterarme todavía de lo que significa, así que le puse el vino y lo dejé un ratito a la candela.
4. Añadir el vinagre de Jerez o de Módena, los granos de pimienta, la sal, el azúcar, la piel de naranja (muy bien lavadita con un cepillito) y el laurel.
5. Dejar cocinar unos 4 minutos, bajar el fuego y dejar reducir 1/3 de su volumen.
6. En una bandeja dejar macerar las sardinas con la mezcla unas 12 horas como mínimo.
7. Colocar sobre tostaditas, con unas rebanadas de tomate cherry y unas escamas de sal Maldon.

Nota de Livia: la siguiente vez que las prepare intentaré hacer más caldosa la mezcla de maceración para que las sardinas queden mejor sazonadas.
_________________________________________________________________

Arriving at the very last minute... the last reader's recipe we received this month, by Livia Artiles.

Livia, much like Cristina, is no cooking enthusiast but this time around she put her apron on and took to the kitchen so she could join in the fun. For that, we are very grateful and ever so happy here at Cocina Global! 

As expected, Livia brings us a Venezuelan dish, following a recipe by Sumito Estévez, a famous chef in her country. 

Ingredients:
24 sardine fillets
150g flour
200ml olive oil
100g cubed onions
2 little coffee size spoons of curry powder
ittle coffee size spoons of sherry vinegar
5 garlic
100ml white wine
10 pepper grains
salt/sugar
skin of one orange
2 bay leaves

Preparation:
1. Season the sardines with salt and pepper. Pass them through the flour.
2. Put the sardines in a very hot frying pan until golden. Dry and reserve.
3. Saute the onions in olive oil; add the garlic and the curry powder. Deglase the frying pan with white wine.
Livia's note: I wasn't quite sure what this meant, so I put the white wine in the pan and left for a little bit in very low heat.
4. Add the vinegar, pepper, salt, sugar, and orange skin (washed) and the bay leaves.
5. Cook for 4 minutes in strong heat, then leave in low heat until 1/3 of the volume has been reduced.
6. Put the sardines on a tray with the above mixture and leave for at least 12 hours.
7. Eat over bread with cherry tomatoes!

Note: for next time, Livia will aim to cook more mixture to ensure the sardines are better marinated.


martes, 4 de septiembre de 2012

Sardinas rellenas estilo italiano / Italian stuffed sardines


Después de la experiencia de Cristina con la picadora para elaborar esta receta, no sé yo si querrá prepararla de nuevo... Pero me recuerda que debemos poner una nota en este blog que diga "no nos hacemos cargo de los electrodomésticos, utensilios u otros "aparatejos" que puedan salir perjudicados... con nuestros disparates ya no damos a basto!" Espero que para las siguientes no haya más desastres!

Así que nos es grato contar con la colaboración de Cristina en esta ocasión porque sabemos que ha hecho un gran esfuerzo por meterse a la cocina y realizar esta espectacular receta que nos comparte.

Este es un plato muy adecuado si queremos unas deliciosas tapas. Se debe preparar con antelación, y aunque es un poco elaborado, la ventaja es que es bastante económico y se puede servir tanto en frío como en caliente.

Ingredientes (para 4 personas):

12 sardinas grandes                                        
1 cebolla pequeña
30g de piñones                                  
30g de pasas
6 briznas de hierbabuena                           
6 briznas de perejil
80g de pan rallado                                    
½ cucharadita tamaño café de pimentón
3 pellizcos de azúcar                                         
4 cucharadas tamaño sopero de zumo de naranja
cucharadas tamaño sopero de vinagre de vino blanco                       
cucharadas tamaño sopero de aceite de oliva
sal y pimienta

Preparación:

Pedir en la pescadería que vacíen las sardinas, quiten las cabezas y las escamas, retiren la espina central sin sacar los filetes.  Enjuagar y secar las sardinas, salpimentar.

Nota de Cristina: En el supermercado solo me vaciaron y quitaron las cabezas porque “no había mucha gente”.  Me tocó quitar las escamas y la espina central, cosa que nunca había hecho en mi vida antes.  Resultó un poco laborioso pero entretenido porque me recordó las clases de disección del colegio.

Para el relleno:
1. Pelar la cebolla y picarla. En una sartén, dorar la cebolla 2 minutos con la mitad del aceite. Añadir los piñones, dorar otros 2 minutos. Y volcar todo en un cuenco. 
2. Añadir el pan rallado, el azúcar, el zumo de naranja, el vinagre, las hierbas aromáticas cortadas y el resto de aceite, salpimentar y mezclar todo. Tiene que quedar una mezcla algo compacta, si hace falta se puede añadir un poco más de aceite hasta conseguir la consistencia deseada.
3. Precalentar el horno a 210º C.  Engrasar una fuente.  Colocar las sardinas por el lado de la piel sobre una tabla. Colocar el relleno sobre la sardina empezando por el lado de la cabeza.  Enrollar desde la cabeza hacia la cola, sin apretar. Mantenerlas con unos palillos de madera y colocar sobre la fuente.  Rociar con aceite y enhornar durante 25 minutos. 
4. Listo para servir caliente, tibio o frío.
_________________________________________________________________

After Cristina's experience with the blender to make this recipe, I don't know if she will want to prepare it ever again... But it reminds me that we should put a note on this blog that says "we will not look after the appliances, utensils or other gadgets that can be harmed during preparation of the recipes... we already have to mind our own silliness!". We hope the next recipes won't suffer any more disasters!

That said, we're pleased to have Cristina participating this time because we know that she has made a great effort to get in the kitchen and make this spectacular recipe that she shared with us.

This is a dish well suited if you want some delicious "tapas". It must be prepared in advance, and although it is a little tricky, the advantage is that it is fairly inexpensive and can be served either cold or hot.

Ingredients (serves 4):

12 large sardines
1 small onion
30g pine nuts
30g raisins
6 stalks of peppermint
6 stalks of parsley
80g of breadcrumbs
½ teaspoon of paprika
3 pinches of sugar
4 tablespoons of orange juice
1 tablespoon of white wine vinegar
3 tablespoons of olive oil
salt and pepper

Preparation:

Ask the fishmonger to empty the sardines, removing the heads and scales, and the backbone too, without removing the steaks. Rinse and dry the sardines, and then season with salt and pepper.

Cristina's note: In the supermarket, they only emptied and removed the heads because there were not so many people. I had to remove the scales and the backbone myself, something that I had never done in my life before. It turned  out a bit laborious but funny because I remembered the school dissection classes.

For the filling:
1. Peel the onion and chop. In a skillet, fry the onion until golden for 2 minutes with half the oil. Add the pine nuts, sauté another 2 minutes. Put everything in a bowl.
2. Add the breadcrumbs, sugar, orange juice, vinegar, chopped herbs and the remaining oil, salt and pepper and mix everything. It must be a compact mixture, if necessary you can add a little bit more oil until desired consistency.
3. Preheat the oven to 210 ºC. Grease a baking tray. Place the sardines skin side on a table. Place the filling on the sardine starting with the side of the head. Roll up from head to tail, loosely. Keep them with wooden chopsticks and place on the tray. Spray with oil and put in the oven for 25 minutes.
4. Ready to serve hot, warm or cold.

lunes, 3 de septiembre de 2012

Ensalada caliente de sardinas y pasta / Warm sardine & Pasta salad


Nuestro lector Jamie nos ha mandado la primera receta de Cocina Global! Gracias, Jamie!

Jamie nos propone un plato simple y rápido, excelente para esas noches que llegas tarde del trabajo y no piensas en nada mejor que sentarte en el sofá con los pies sobre la mesita, y en la que realmente te apetece una cena de recalentado!

Con palabras de Jamie:

Esta es una receta sencillísima y rápida, con ingredientes que siempre tengo a mano en los armarios de mi cocina, por lo que es un plato recurrente cuándo no hay otra cosa. También es tan simple que solo se necesita una cacerola,  así que solucionado el tema limpieza!

Necesitas: 

Pasta
Mix de verduras congeladas 
(que puedes encontrar en cualquier supermercado)
Sardinas en lata (si quieres con salsa)
Maionesa (opcional)


1. Cocer la pasta, y de 3-5 minutos antes de terminar la cocción añadir
el mix de verduras congeladas. Seguir hirviendo hasta que todo esté
cocido.
2. Usando la tapa de la olla, escurrir la pasta y las verduras
3. Abrir la lata de sardinas y romper las sardinas con la ayuda de un
tenedor. Añadir a la pasta y a las verduras y remover bien. En esta ocasión (como se ve en las fotos) las sardinas eran en salsa de tomate. Si te gusta con otra salsa más puedes añadirle maionesa.
4. Sazonar al gusto (sal, pimienta, hierbas, etc) y voilá, una comida rápida y sencilla, con sardinas.
Nota: También puedes utilitzar otras conservas de pescado .
_________________________________________________________________

Reader Jamie sent us the very first recipe of Cocina Global! Thank you, Jamie!


Jamie sent a simple and quick dish, excellent for those week nights when you arrive late from work and can think of nothing better than to sit on the sofa with your feet up, whilst also really fancy a warming dinner!

In Jamie’s words:

This is a very simple dish, composed of ingredients I will always have available in my cupboards, so will often be a fall back meal if I have nothing else in.  It is also so simple that you only need one sauce pan, so light on the washing up!

You’ll need:

Pasta
Frozen mixed vegetables (as found in any supermarket)
Tinned Sardines (optionally already with a sauce)
Mayonnaise (optional)

1. Cook the pasta, and 3-5 minutes before it's done, add the frozen mixed vegetables, and continue simmering for the remaining time, so that both the veg and the pasta are cooked.
2. Using the saucepan lid, drain the pasta and vegetables.
3. Open the sardine tin, and using a fork, break up the sardines, and add to the pasta/vegetable mix, and stir. In the above photo, the sardines came in a tomato sauce. Mayonnaise can be added if you want more of a sauce with it.
4. Season to taste with anything you like - salt, pepper, herbs etc. - and voila!, a quick simple meal, with Sardines.
Note: Other tinned fish can also be used.

domingo, 2 de septiembre de 2012

Sardinas a la lata / Sardines cooked in the canister

Sardinas a la lata / Sardines cooked in the canister

Hace ya más de un año, en un delicioso restaurante de Begur (Costa Brava - Girona) nos sirvieron unos mejillones en una lata. Al principio me quedé algo sorprendida pero al ver que la lata era solo un recipiente decorativo dónde servir el plato elaborado pensé que era bastante original.

La cuestión es que hace unos días me "tropecé" con estas latas (de mejillones, atún y sardinas) en una tienda de utensilios de cocina en Girona. Así que al pensar en la receta del mes se me encendió la bombilla... "Podría preparar algo para servir en la lata".

Al ir dándole vueltas a la receta, me imaginaba algo como sardinas escabechadas, sardinas en aceite... pero quería algo diferente. ¿Porqué no usar el propio recipiente para que cocinarlas?

Y eso me llevó a recordar que hay un plato típico catalán denominado Caracoles a la llauna (caracoles a la lata). Entonces, ¿por qué no hacer Sardinas a la lata?... Así empezó la creación de esta receta:

Ingredientes:
Sardinas limpias y sin cabeza - de 3 a 4 por cada lata a preparar y de preferencia pequeñas para que quepan bien
Tomates frescos
Ajo
Perejil
Pan rallado
Harina  - de preferencia especial para pescado
Sal
Aceite de gira-sol y de oliva

Preparación:
1. Hervir un poco de agua en un cazo. Limpiar bien los tomates y hacerles un corte en forma de cruz en la parte inferior del tomate (dónde no tiene hojas). Ponerlo en el agua hirviendo y apagar el fuego. A los pocos minutos, cuándo vemos que la piel se empieza a desprender, los pelamos.
2. Sofreír un poco de ajo picado con aceite y añadir el tomate ya rallado o triturado. Dejar cocer a fuego lento para que vaya quedando una salsa de tomate de consistencia espesa.
3. Enharinar las sardinas y freírlas en una sartén con un poco de aceite de girasol.
4. Preparar una mezcla con pan rallado, perejil y ajo picados.

Sardinas a la lata (preparación) / Sardines cooked in the canister (Preparation)

5. Poner un poco de salsa de tomate en el fondo de la lata. Encima servir las sardinas fritas. Y a continuación cubrir con la mezcla de pan rallado, perejil y ajo. Añadir un chorrito de aceite de oliva. Y gratinar por unos 3 minutos hasta que quede una costra dorada.
6. Listo para servir en su lata. Y a disfrutarlo.

Eva Linda

NOTA: En los siguientes días iremos publicando las otras entradas de Recetas con Sardinas que hemos recibido.
_________________________________________________________________________________


More than an year ago, in a delicious restaurant in Begur (Costa Brava - Girona) they served us a mussels in a can. At first I was a little surprised, but I thought it is quite original to use as a decorative container.

The point is that a few days ago I "stumbled" with these cans (for mussels, tuna and sardines) in a cookware shop in Girona. So when I was thinking about the recipe of the month it come up with ... "I could make something to serve in the can".

Going toying with the recipe, I imagined something like marinated sardines, sardines in oil ... but I wanted something different. Why not use the actual container for cooking?

And that led me to remember that there is a typical Catalan dish called snails (snails cooked in a canister). So why not do canned sardines? ... Thus began the creation of this recipe:

Ingredients:

Sardine clean and without head - from 3 to 4 per canister and preferably small to fit well
Fresh tomatoes
Garlic
Parsley
Breadcrumbs
Flour - special preference for fish
Salt
Sunflower and olive oil

Preparation:

1. Boil some water in a saucepan. Thoroughly clean the tomatoes and cut them in a cross in the bottom of the tomato (where no leaves). Put it in the boiling water and turn off heat. A few minutes later, when we see that the skin starts to peel, peel it.
2. Lightly some garlic with oil and add chopped grated or crushed tomatoes. Cook it slow to obtein a tomato sauce thickens.
3. Cover sardines with flour and fry it in a pan with a little beat of sunflower oil.
4. Mix the bread crumbs, parsley and garlic.
5. Spread some tomato sauce on the bottom of the canister. Above serve fried sardines. And then the mixture covered with breadcrumbs, parsley and garlic. Add a drizzle of olive oil. And broil for about 3 minutes until a golden crust.
6. Ready to serve in his canister. And enjoy it.

Eva Linda

NOTE: In the following days, we'll show you the other Sardines' recipes we received.