viernes, 5 de octubre de 2012

Calabaza / Pumpkin

Calabaza

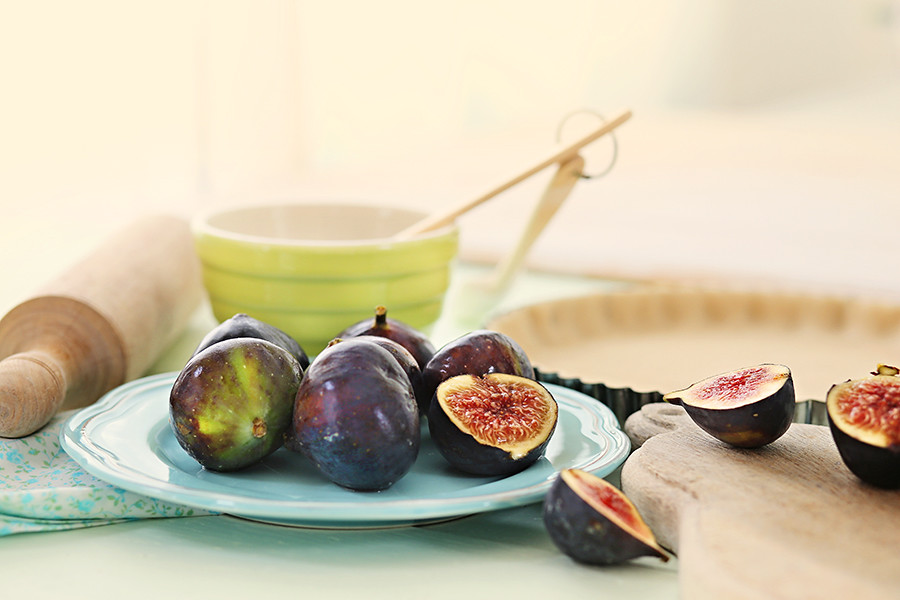
Empezó el otoño, y con él sus colores naranja-amarillos-rojizos tan espectaculares. Y queríamos que eso se reflejara en los platos de este mes.

Seguro que si os hubiéramos dicho que este ingrediente tiene una gran relación con Halloween inmediatamente hubierais respondido...
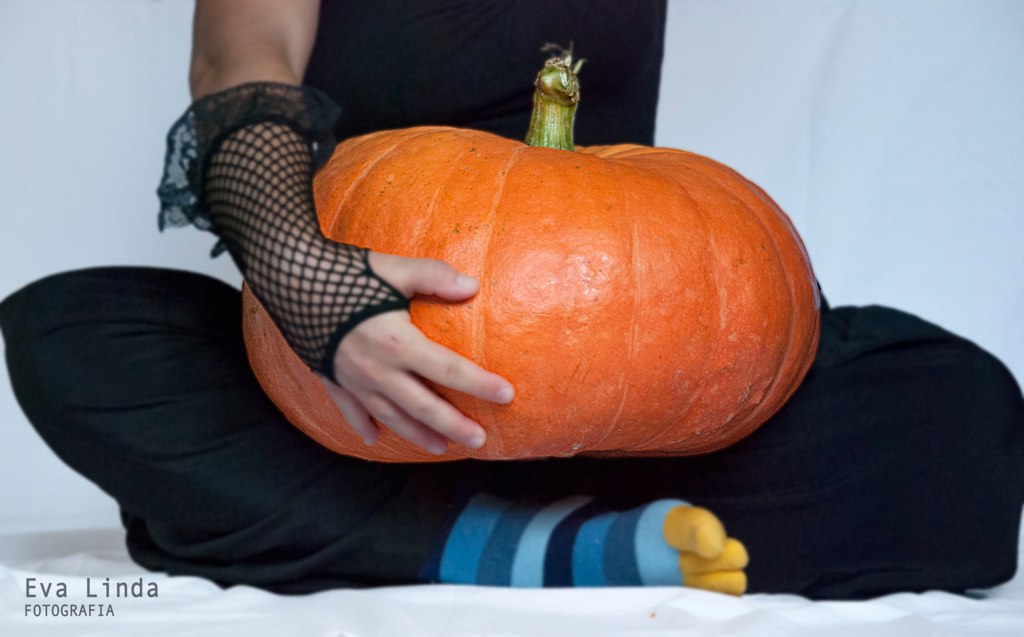
CALABAZA

La calabaza, también denominada zapallo, uyama, ayote... en definitiva Cucurbita (para los amigos) es una planta trepadora, de flores amarillas y/o anaranjadas. El fruto es una baya comestible de color verde a naranja intenso y la pulpa tiene un delicado sabor dulce.

En esta época del año forma parte de la gastronomía tradicional de muchas regiones del mundo para festejar diversos eventos. En México, se consume el dulce de calabaza o calabaza en tacha en Día de Muertos. En USA y Canadá se prepara la tarta de calabaza durante el Día de Acción de Gracias. El Reino Unido cuenta con una extensa tradición de tallar linternas a partir de verduras,  por lo que las calabazas son las más usadas para Halloween.

Así que, ¿qué estás esperando?, ¡ve a por tu calabaza!. Prepara una receta y aprovéchala para decorar tu casa. Envíanos la foto de la receta y si quieres también de la decoración con calabazas antes del 02 de noviembre a blogcocinaglobal@gmail.com o publícala en tu blog y mándanos el enlace.

Fuentes:
Monografía de la calabaza: fruto y semilla (Financiera Rural, Gobierno de México) 
http://www.financierarural.gob.mx/informacionsectorrural/Documents/Monografias/Monograf%C3%ADaCalabaza%28ene2011%29vf.pdf
Ayote (FAO): http://www.fao.org/inpho_archive/content/documents/vlibrary/AE620s/Pfrescos/AYOTE.HTM
The history of Pumpkins: http://kitchenproject.com/history/Pumpkin/index.htm
________________________________________________________________

Autumn has started, bringing the beautiful yellow and orange and red tones which make this such an eye candy season. We would like a bit of these colours in this month's recipes and images.

Another clue for this month's ingredient is its connection to Halloween... we're of course thinking of...

PUMPKINS

Pumpkins belong to the genus Cucurbita and are a  gourd-like squash with a few relatives around (like butternut squash).  Typically have a thick, orange or yellow shell which protects a delicately sweet pulp.

Around this time of year, pumpkin is used throughout the world to celebrate different events. In Mexico, it is used in sweet pumpkins (calabaza en tacha) for the 1-2 November (Día de Muertos). In the US and Canada, pumpking pie is a must in Thanksgiving celebrations. In the UK, following a long tradition of carving lanterns from vegetables, pumpkins are commonly used around Halloween.

This is your mission for October: to prepare a recipe with pumpkin and, why not?, use the shell to decorate your house for the season. Send us a photo of your recipe (and of the decorations you make with it, if you so wish!) before Friday 2 November to blogcocinaglobal@gmail.com and we'll publish it here. Or you can publish it in your blog and send us the link.


Sources:
Monografía de la calabaza: fruto y semilla (Financiera Rural, Gobierno de México) 
http://www.financierarural.gob.mx/informacionsectorrural/Documents/Monografias/Monograf%C3%ADaCalabaza%28ene2011%29vf.pdf
Ayote (FAO): http://www.fao.org/inpho_archive/content/documents/vlibrary/AE620s/Pfrescos/AYOTE.HTM
The history of Pumpkins: http://kitchenproject.com/history/Pumpkin/index.htm

Tarta de higos y queso de cabra / Figs and goats cheese tart


Cuándo Jackie Rueda nos dijo que quería participar este mes en Cocina Global con una tarta salada de higos, empezamos a brincar de alegría las dos (Las Chefs) "agarraditas de las manos", a pesar de estar a unos cuántos kilómetros de distancia.

Debemos confesar que nos hace feliz contar con esta maravillosa colaboración, no sólo porque Jackie es una gran fotógrafa y nos encanta su fotografía. Sino porque Jackie es la razón por la cuál nos conocimos (Las Chefs) y dónde empezó toda esta aventura en la cocina de Cocina Global, míralo!

Jackie nos trae esta quiche, que es su adaptación de una de las recetas del bellísimo libro Seasons de Donna Hay. Nos cuenta, que esta receta pertenece a los platos de verano e indica el uso de masa para tartas comprada en el supermercado. Lo cuál le parece fabuloso porque es una forma práctica de poderla hacer cualquier día, aunque estemos muy ocupados.

Cómo nos dice Jackie, para poder desmoldar correctamente la tarta una vez cocina es preferible el uso de un molde desmontable especial para quiche o tartas. De esta forma se puede desmoldar sin tener que invertirla y mantener así el borde rizadito y que quede preciosa.

Sin más preámbulos, aquí os dejamos con la explicación de Jackie para preparar esta receta que ya nos hace salivar.

                                                             Ingredientes:

Fig & Goat Cheese Tart (+ two in comments)
1 masa para tartas (Yo en Canadá uso la Pillsbury)
3 huevos
3/4 de taza de crema/nata de leche para cocinar (yo uso la de 15%MG)
4 higos maduros lavados
1/4 taza de queso parmesano rallado
125g de queso de cabra cremoso
cebollino (ciboulette) picado
Sal y pimienta negra recién molida


Preparación:
1. Precalentar el horno a 355ºF/180ºC y, si el molde no es antiadherente, enharinarlo con mantequilla y harina.
2. Cubrir con la masa, presionando suavemente con los nudillos de los dedos para adaptar la masa a la forma del molde y hacerle pinchacitos con un tenedor por todo el fondo.
3. Colocar encima las piezas de higo (cortados a cuartos) distribuyéndolos bien. Luego llenar los espacios restantes con el queso de cabra.
4. En un bol, mezclar los huevos, la crema, el queso parmesano, el cebollino y una pizca de pimienta y otra de sal.
5. Verter esta mezcla sobre la quiche. Cómo luego llevarla al horno es una operación muy complicada y siempre se me derrama, lo que hago es ponerla sobre la rejilla del horno antes de verter los líquidos dentro de ella. Así, no hay riesgo de accidentes.
6. Hornear la tarta durante unos 30-35 minutos o hasta que se vea dorada e infladita. Dejarla reposar y servir tíbia y a temperatura ambiente acompañada de una ensalada verde.

Y que levante la mano quién quiere que le sirvamos un cachito. ¡Imposible resistirse a tal tentación! :)


_________________________________________________________________________________

When  Jackie Rueda told us she would be participating in Cocina Global with a recipe for fig quiche, both of us jumped up and down in joy (in spite of being a little bit far apart geographically!).

It really warms us inside to have Jackie on Cocina Global, not only because of Jackie's amazing photography but also because we met doing one of Jackie's photography courses and that's where our cooking adventure began, look!

Jackie brings this fig quiche as an adaptation from Donna Hay's book, Seasons. This recipe belongs to the summer dishes section and uses pastry bought in the supermarket, which is quite genius for when we're busy but would still like something nice and yummy to eat!

Jackie highlights that to better remove the quiche from the dish it is best to use a quiche or tart dish with a removable base; this ensures it looks absolutely beautiful when serving… and for photographs, we imagine!


Without further ado, here is Jackie's mouthwatering fig recipe.


Ingredients:

Pastry for quiches (Yo en Canadá uso la Pillsbury)
3 eggs
3/4 cup of single cream (Jackie uses 15%MG)
4 ripe figs, washed
1/4 cup of grated parmesan cheese
125g soft goats cheese
a little bit of finely chopped chives
Salt and freshly grounded black pepper

Preparation:
1. Pre-heat the oven to 355ºF/180ºC and grease your dish with butter and a little flour.
2. Put the pastry in the dish, pressing gently with the knuckles to mold the pastry to the dish; pierce the bottom of the pastry with a fork.
3. Put the figs (cut in quarters) on top of the pastry, making sure you spread them evenly. Fill the gaps with the goats cheese.
4. In a bowl, mix the eggs, cream, parmesan cheese, chives, salt and pepper.
5. Tip this mix over the quiche. As there can be some spillages at this stage, I typically place the quiche dish on the oven rack, then spill the mix onto it and then just push the rack inside the oven.
6. Bake the quiche for 30-35 minutes or until golden and inflated. Leave it to rest and serve warm or to room temperature, with a green salad.

Hands up if you want a piece! Impossible to resist temptation :)

jueves, 4 de octubre de 2012

Tatin de higos / Tatin of figs


Es un placer contar con la compañía de Raquel Rodriguez que nos trae una versión de la famosa receta francesa de la Tarta Tatin. Una forma sencilla de quedar de lujo en un santiamén con tan solo 4 ingredientes.

Ingredientes:
1 cucharada sopera de mantequilla
2 cucharadas soperas de azúcar
15 higos frescos
Masa brisa ya preparada

1. Untar el fondo de una sartén con la mantequilla. 
2. Disponer los higos cortados por la mitad de una forma decorativa rellenando toda la base. 
3. Espolvorear todo el azúcar y poner al fuego. Cuando empiece a quedar líquido, retirar del fuego y cubrir la sartén con la masa brisa (pinchada con un tenedor). 
4. Hornear unos 15 minutos a 180ºC. 
5. Con un recipiente más grande dar la vuelta a la tatin, con mucho cuidado de no quemarnos. Y dejar enfriar.

Nota de RaquelSe puede acompañar con nata líquida o una bola de helado de nata.
________________________________________________________________

It is so nice to have the company of Raquel Rodriguez this month; Raquel brings us a version of the famous French recipe of Tarte Tatin. An easy way to get a luxurious recipe in a flash with just 4 ingredients.

Ingredients:
1 tablespoon of butter
2 tablespoons of sugar
15 fresh figs
Puff pastry for the base


1. Coat the bottom of a frying pan with butter.
2. Cut your figs in half and put them in the pan, in a decorative way covering all the whole surface.
3. Sprinkle the sugar into the pan and heat it; when it starts to become liquid, remove from the heat and place the puff pastry on top, piercing it with a fork.
4. Bake for about 15 minutes at 180 º C.
5. Turn the tart into a larger container, being careful not to burn yourself. And let cool.

Rachel's Note: Serve with whipped cream or a scoop of ice cream.


Tarta de higos y requesón / Figs and ricotta tart


En esta ocasión, pedimos un aplauso... (¡sí, así, que todo el mundo lo escuche!) porque Cristina Molina se ha colgado de nuevo el delantal al cuello, y aquí viene pisando fuerte con su Tarta de higos y requesón versionada, para 6 porciones.

Ingredientes para la masa:
120g de harina
1 pizca de sal
75g de mantequilla fría cortada en dados
25g de almendra molida 
agua fría

Ingredientes para el relleno:
6 higos
100g de azúcar granulado fino
600ml de agua
500g de ricotta 
4 yemas de huevo
1/2 cucharada tamaño café de azúcar vainillado
3 cucharadas soperas de miel (2 para el relleno y una para decorar)

Preparación:
1. Untar con mantequilla un molde acanalado desmontable de 22 cm diámetro.
2. Tamizar la harina y la sal en un bol, incorporar la mantequilla e ir trabajando hasta obtener una consistencia como de pan rallado.
3. Añadir la almendra y un poco de agua fría, hasta formar una masa compacta.  
4. En una superficie enharinada, extenderla en un círculo 8 cm más grande que el molde.
5. Forrar el molde con la masa, presionándola con los dedos para adaptarla y pasar el rodillo por el borde para recortar el exceso de masa.
6. Extender papel vegetal, esparcir unas legumbres secas y dejar la masa 30 minutos en el frigorífico.  Mientras tanto, precalentar el horno a 190 ºC.


Nota de Cristina: como mi molde es fijo y liso, extendí la masa sobre una hoja de papel vegetal para luego colocar la hoja con la masa en el molde.  Fue más fácil sacar la tarta.

7. Cocer la base 15 minutos; retirar el papel y las legumbres y hornearla 5 minutos más.
8. Poner los higos en un cazo con la mitad del azúcar y el agua. Cocerlos 10 minutos, luego escurrirlos y dejarlos enfriar.  
9. Escurrir el requesón e incorporar las yemas de huevo, la esencia de vainilla, el azúcar restante y la miel; y mezclar bien.
10. Verter encima de la tarta ya horneada y hornear de nuevo unos 30 minutos.
11. Sacar del horno y en el momento de servir partir los higos por la mitad a lo largo y colocarlos sobre la tarta con el lado cortado hacia arriba.
12. Verter la miel por encima de la tarta y servir en seguida.

¡Gracias Cristina por acompañarnos de nuevo con esta súper receta!


_________________________________________________________________

For this recipe we need a round of applause, please... (loudly, so everyone can listen!)... because  Cristina Molina wore an apron once again, and brings us a new version of tart of figs and curd cheese for 6 servings.

Ingredients for the pastry:
120g flour
1 pinch of salt
75g cubes of cold butter
25g ground almonds
cold water

Ingredients for the filling:
6 fresh figs
100g fine granulated sugar
600ml water
500g curd ricotta cheese
4 egg yolks
1/2 tablespoon of vanilla sugar
3 tablespoons of honey (2 for filling and 1 for the garnish)

Preparation:

1. Grease a 22cm tart dish with butter.
2. Sieve the flour and salt into a bowl, add the butter and work up a  dough with the consistency of breadcrumbs.
3. Add the ground almonds and a little cold water to form a compact dough.
4. On a floured surface, spread it in a circle 8 cm larger than the dish.
5. Line the pan with the dough, pressing it with your fingers to fit and pass the roller over the edge to trim the excess dough.
6. Cover with baking paper, sprinkle some dry beans or chickpeas on top and leave the dough in the refrigerator for 30 minutes. Meanwhile, preheat the oven to 190 ° C.


Cristina's Note: as my dish does not come apart, I stretched out the dough on to baking paper and then placed this in the tart dish; it makes it easier to remove the tart at the end. 

7. Cook the pastry for about 15 minutes; remove the paper and the beans and bake for 5 more minutes.
8. Place the figs in a saucepan with half the sugar and water. Cook them 10 minutes, then drain and let them cool.
9. Drain the curd and add the egg yolks, vanilla essence, remaining sugar and honey and mix well; pour over the already baked pastry and bake for 30 minutes.
10. Remove from the oven and when you are ready to serve it, cut the figs in half lengthwise and place them on the tart with the cut side up.
11. Pour honey over the tart and serve immediately.

Cristina, thanks for joining us again with this delicious recipe!


miércoles, 3 de octubre de 2012

Tostadas con higos / Toasts with figs


Hoy nos llega, por primera vez también, Altea (Las cosas del Solete) con este entrante o merienda repleto de sabor. 

Nos gusta saber que Altea había comprado higos para su familia y al llegar a casa vio el ingrediente del mes, así que se decidió a participar. Por lo que nos comparte esta receta con la que ha triunfado en su casa y desea que también sea un éxito en la vuestra. 

Ingredientes:
rebanadas de pan de centeno
lechuga o mezclum
queso tierno o queso de cabra (al gusto de cada uno)
higos frescos
pimentón agridulce (pero del bueno, con un toque ahumadito)
aceite de oliva

Preparación:
1. Tostar ligeramente el pan para que quede crujiente y de paso quitarle un poco el toque ácido que suele tener este tipo de pan.
2. Añadir una "cama" de lechuga bien troceadita.
3. Colocar el queso por encima.
4. Cortar los higos en rodajas y colocar encima del queso.
5. Dar "el toque maestro" espolvoreando un poco de pimentón por encima y unas gotas de aceite de oliva.

Nota de Altea: el contraste del sabor dulce del higo con el pimentón es realmente sorprendente!

Y se despide de nosotros con un "hasta la próxima". Así que te tomamos la palabra, y te esperamos para el siguiente mes!
________________________________________________________________

Today, arrives Altea (Sunny's things) for the first time with this starter or a night tea dish with full taste.

We like to know that Altea bought figs for her family and when she arrives at home she had seen the ingredient of this month. It's exactly what she bought and she decided to participate.

Ingredients:
slices of rye bread
lettuce or mesclun
soft cheese or goat cheese (to everyone's taste)
fresh figs
bittersweat paprika (the best, preferably smoked)
olive oil

Preparation:

1. Toast the bread lightly to make it crispy and remove a little touch of acidity that's been often in this type of bread.
2. Put a chopped lettuce's bed.
3. Place cheese on top.
4. Cut the figs into slices and place on top of cheese.
5. Give "the finishing touches" sprinkle a little paprika on top and a few drops of olive oil.

Altea's note: the contrast of sweet fig with paprika is truly amazing!

And she says goodbye to everyone with a "until the next". So we take your word, and we hope you'll be here again next month!


martes, 2 de octubre de 2012

Higos con sobrassada / Figs with sobrassada (Mallorca's sausage)


Y la primera receta de este mes nos la trae Montse Oliver, poniendo el toque saladito en forma de tapa.

En esta ocasión, Montse nos presenta el uso de un ingrediente de la cocina balear. Quién vaya de viaje a las Islas Baleares (Mallorca, Menorca, Ibiza o Formentera) no puede pasar por allí sin probar la famosa sobrasada.La sobrasada es un embutido crudo curado a base de carne de cerdo condimentada con pimienta, sal y pimentón.

Vamos a preparar las tapas para unas 4 personas.

Ingredientes:
12 higos maduros
sobrasada de Mallorca (de buena calidad)
vinagre
aceite de oliva virgen extra
caramelo líquido

Preparación:
1. Lavar bien los higos y secarlos.
2. Cortar el cuello y cortar en forma de cruz sin llegar a cortar todo el higo.
3. Precalentar la parte inferior del horno a 200ºC
4. Rellenar los higos con un poco de sobrasada y cerrarlos dejando el relleno en el interior.
5. Colocar los higos en una bandeja apta para hornear previamente untada con aceite.
6. Condimentar con un poco de vinagre y un chorrito de caramelo líquido.
7. Hornear a 180ºC durante unos 15 minutos o hasta que los higos hayan caramelizado.
8. Servir encima de unas tostadas o en una cuchara para comer de un solo bocado, cómo una "amuse bouche". Dejar enfriar un poco antes de comer ya que así son más gustosos.
Nota: lo mejor es el jarabe que queda en la bandeja, por lo que vamos a aprovecharlo para salsear un poco los higos en el momento de servir.

Bon Profit! (Que aproveche) de parte de Montse. Y aprovechamos para agradecerle su primera participación con esta maravillosa receta.

Más información sobre la sobrasada en: http://es.wikipedia.org/wiki/Sobrasada

_______________________________________________________________

And the first recipe of this month comes from Montse Oliver, with some tapas with a little touch of saltiness. 

This time, Montse presents an ingredient of the Balearic cuisine. Those of you thinking of travelling to the Balearic Islands (Mallorca, Menorca, Ibiza and Formentera) can not pass by without trying the famous sobrasada. Sobrasada is a raw cured meat pork sausage seasoned with pepper, salt and paprika.

We prepared this "tapas" for 4 people.

Ingredients:
12 ripe figs
Mallorca's sobrasada (good quality)
vinegar
extra virgin olive oil
caramel 

Preparation:
1. Wash and dry the figs.
2. Cut the neck and do a cross-shaped cut without cutting all the fig.
3. Preheat oven to 200°C.
4. Fill the figs with a little sobrasada and close leaving the filling inside.
5. Place the figs on a baking tray previously greased with oil.
6. Season with a little vinegar and a drizzle of caramel.
7. Bake at 180°C for about 15 minutes or until the figs have caramelized.
8. Serve over toast or on a spoon to eat in one bite, like an "amuse bouche". Let it cool slightly before eating as it's yummy-er that way!
Note: the syrup left in the pan is the best, so let's use it to drizzle the figs at the time of serving.

Bon Profit! (Enjoy your meal) from Montse. And we take the opportunity to thank him for his first involvement with this wonderful recipe.

More information about sobrassada: http://en.wikipedia.org/wiki/Sobrassada

lunes, 1 de octubre de 2012

Ensalada tíbia de higos, queso de cabra y tocino / Warm fig, goats cheese and bacon salad


Debo confesar que hasta que no me puse a cocinar esta receta, a mi no me gustaban mucho los higos. Pero desde ese momento, me he convertido en una amante de los higos y ya he preparado esta receta un par de veces... y además he hecho una deliciosa mermelada de higos!

La ensalada de higos calientes, queso de cabra y tocino es muy sencilla y rápida de preparar para cada ocasión, de verdad! Ya lo verás, manos a la obra...

Ingredientes
2 higos por persona
Queso de cabra
Tocino (o panceta o jamón)
Vinagre balsámico
Piñones
Hojas de lechuga (yo utilizé berros, espinacas y rúcula)
Aceite de oliva
Romero seco


Preparación
1. Precalentar el horno a unos 200ºC. Colocar una rebanada de tocino por persona en una bandeja y hornear hasta que quede dorada y crujiente a su gusto (yo la horneé unos 25 minutos)
2. Desmenuzar el queso de cabra junto con el romero seco y aliñar con el vinagre.

3. Cortar la cola de los higos y partirlos a la mitad. Aliñar con el vinagre balsámico una de las mitades. Con la otra hacer un corte y rellenarla de la mezcla de queso preparada anteriormente. En el otro higo hacer un corte en forma de cruz en la base del higo sin terminar de cortarlo y rellenarlo con la mezcla de queso hasta que esté lleno (o al gusto, he usado una cucharita de café para poder rellenarlos bien). Cocer al horno durante unos 20 minutos o hasta que estén cocidos.


4. Poner las hojas de lechuga en bol junto con unos piñones y aliñar con aceite de oliva.
5. Sacar el tocino del horno y cortarlo en trozos pequeños. Añadirlos a la ensalada.
6. Retirar los higos del horno y colocar cuidadosamente encima de la ensalada.
7. Voilá! Ensalada tíbia de higos con queso de cabra y tocino.


________________________________________________________________

Up until the day I cooked this recipe, I was not a fan of figs. From then on, I have become a fig lover and have since prepared this recipe twice more... and made a delicious fig jam as well!

The warm fig and goats cheese and bacon salad is simple and quick to prepare, making it ideal for... every occasion, really! Let's get cracking...

Ingredients
2 Figs per person
Goats cheese
Bacon (or pancetta or prosciutto)
Balsamic vinegar
Pine nuts
Salad leaves (I used watercress, spinach and rocket!)
Olive oil
Dried rosemary

Preparation
1. Turn on the oven at around 200ºC. Place one slice of bacon per person on a tray and put it in the oven. Leave to toast and crisp to your liking (I cooked it for 25 minutes).
2. Crumble the goats cheese with a little bit of dried rosemary and balsamic vinegar to taste.
3. Cut off the top of your figs. Cut one fig in half and drizzle one half with balsamic vinegar; put a small portion of your goats cheese mix on top of the other half. Cut a cross like opening on the top of the remaining fig; hold it gently and squeeze in the rest of your goats cheese mix until it's full (or to taste; I used a tea spoon for this). Put the figs in the oven for 20 minutes or until cooked.
4. Place salad leaves in a bowl and throw a few pine nuts in. Drizzle with a little bit of olive oil.
5. Remove bacon from the oven and cut in small pieces. Add to the salad.
6. Remove figs from oven and place neatly on top of your salad.
7. Voilá! Yummy warm fig salad with goats cheese and bacon.